
Info for Beginners
So you've bought the route and want to jump straight in! But wait, what? You need to know how to drive a train?!?
Don't worry, this simple guide will direct you throught he basic steps of driving your first train up the Buchan Line!
For this tutorial, you will be using the flagship scenario for the route named "Buchan Odyssey". This is a standard "most stops" service from Aberdeen to Peterhead using the Class 25 Diesel Locomotive with 5 passenger carriages. As was common at the time, your train will split in Maud.
Note that you can enlarge each picture by clicking on it.
1. Start the Scenario

From the main Train Simulator Menu, select "Drive" and then select "Career" from the tabs at the top.
You will see a list of routes and their scenarios in the right hand pane. Find "Buchan Odyssey", select it and click "Start"
2. Prepare the train for departure
There are several ways to drive the train, and the different trains all have different techniques and controls. For this tutorial, however, you'll be using the simplest method - the keyboard!

When you start a scenario, a message box typically appears outlining your tasks for the day.
In this case, you are instructed that you will be driving a train to Peterhead.
Open the doors by pressing 'T' and close the message box by clicking the X at the top right.
There are some optional information displays that you can switch on and off. Expert users might drive the train without them, but for this tutorial, you will be using them!
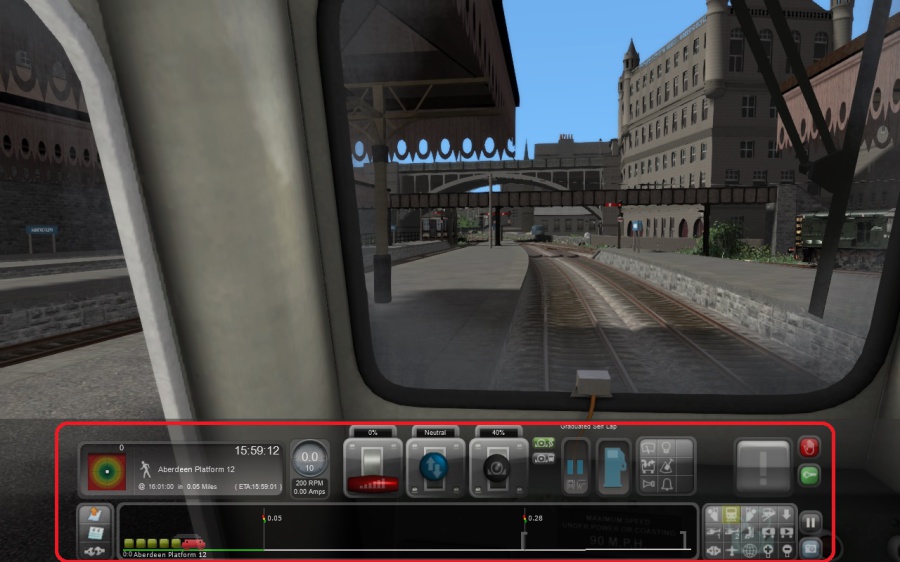
Press F4 until you see the information bar along the bottom like this. This is known as the "HUD", or "Heads-Up Display". It shows various pieces of information that we need for our journey. You can also see them by looking at the dials on the locomotive display, but for now, let's use the HUD.
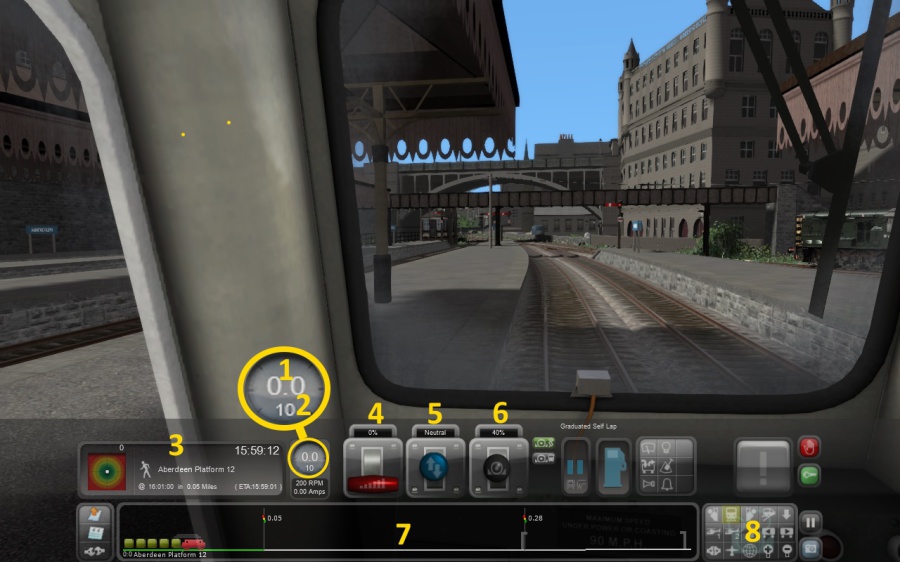
In the diagram below you will see lots and lots of information. I have highlighted the 8 pieces you really need to know to get your train moving!
1. This displays your current speed
2. The smaller number displays the current speed limit.
3. This section shows your immediate destination (ie, the next station you stop at as opposed to your final destination). It also shows both the scheduled and estimated time of arrival
4. This is the power lever.
5. This is the reverser. It is like a gear stick, but only has 3 settings - forward, neutral and reverse.
6. This is the brake lever.
7. This shows what is on the track ahead along with the distance, from left to right. For example, this shows that there is a signal in 0,05 miles and another one in 0.28 miles.
8 These buttons control your view. Always remember that, regardless of your view, you can get back in the cab by pressing 1.
The following keys are the ones you need to know. Again, there are many more keys for many more functions, but for this simple scenario, this should be enough!
Reverser Forward: W
Reverser Back: S
Power Up: A
Power Down: D
Brake Up: ' (apostrophe key)
Brake Down: ; (semi-colon)
Doors Open: T
Headlights On/Off H / Shift-H
Note that the doors will close automatically when you reach the correct departure time, or after a minimum of 35 seconds if you are running late.
Set the resverer to the forward position by pressing W. Switch the headlights on by pressing H once.
You have three minutes from the start of the scenario until you depart, so use the buttons in section 8 in the diagram above to have a look around! You can pan around the screen by holding the right mouse button down and moving the mouse around. If you are in a view that allows it, then you can move around using the cursor keys.
Alternatively, some keyboard shortcuts for changing views are:
1: Cab View
2. Front External View
3. Rear External View
8. Outside View. Good for panning around the area.
A few seconds before you depart, press 1 to jump back in to the cab.
3. Start Your Journey
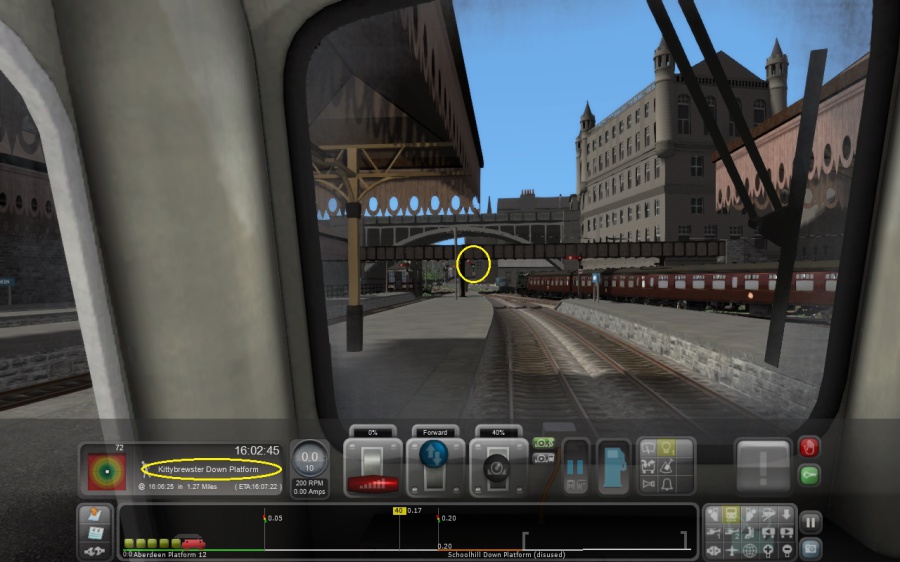
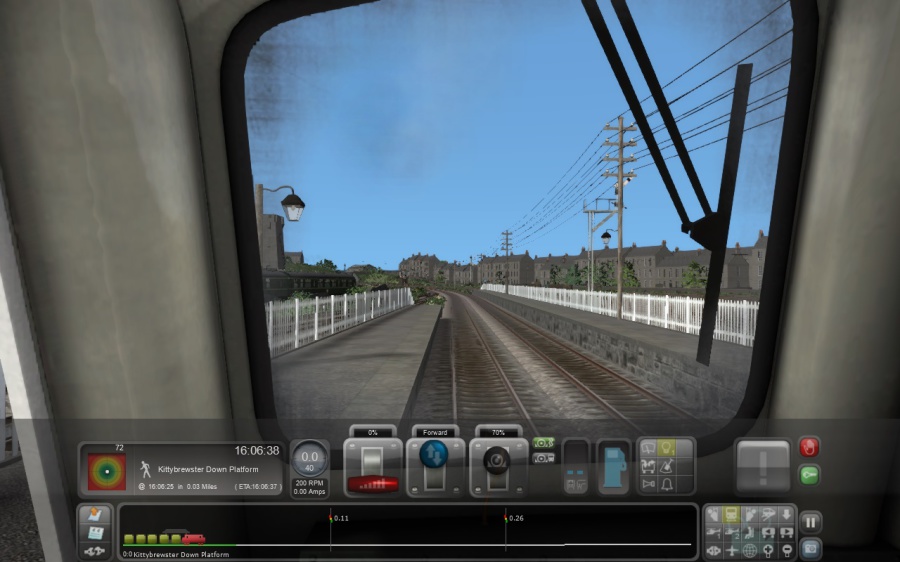
At 16:02 you will see the current destination change to the next stop, which is Kittybrewster station. Hopefully the signal is also clear!
You can see both these things in the diagram here and it looks good, so let's get going.
Press semi-colon to reduce the brakes to 0%
Increase the power by pressing A. You are in a low speed limit section though, so be careful not to increase it too quickly!
Perhaps use a setting of around 35% and watch the speed slowly go up to 9-10 miles per hour. Then switch the power lever to 0% and allow the train to coast. If the speed gets too low then increase it momentarily to remain at around 9-10 mph.
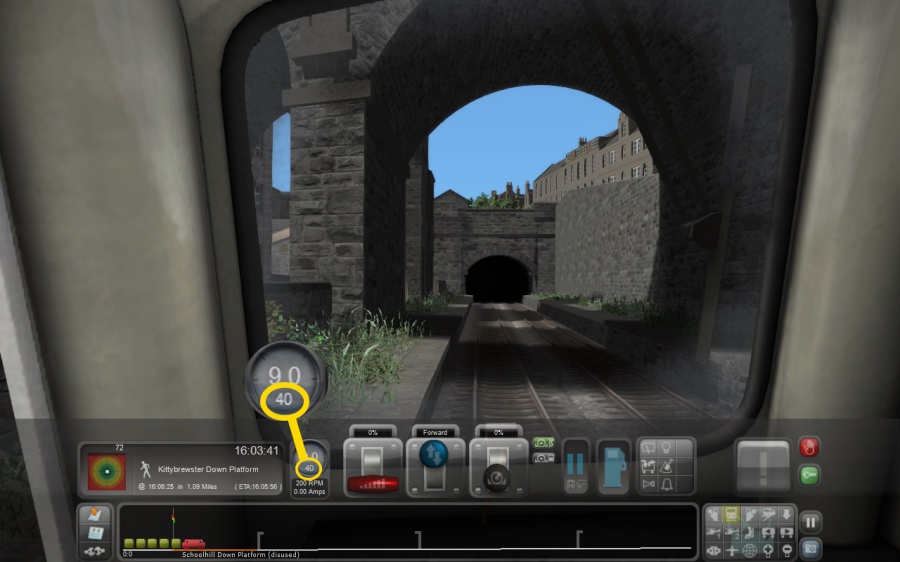
Just before you pass under Denburn Viaduct, you will see that the speed limit increase to 40mph.
Apply full power at this point and let your train accelerate. The line starts to climb steeply up the hill to Kittybrewster, so keep full power applied to stop the train slowing down. If you approach 40mph, then reduce the power slightly to prevent speeding.
4. Making Your First Stop
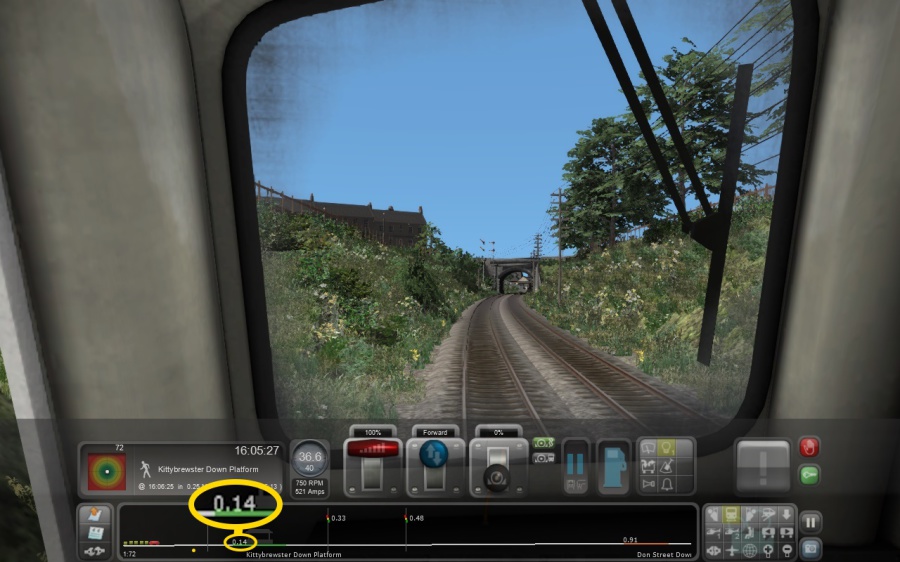
At around about 0.15 miles from Kittybrewster station, reduce the power to 0% and apply the brakes by pressing the apostrophe key.
Use a brake setting of about 40% to begin with, and keep an eye on how quickly the train slows down..
Adjust the brake setting to allow the train to coast in to Kittybrewster station, ensuring the little train in the HUD is fully within the green section, which corresponds to the platform. Alternatively, do it the old fashioned way and look out the window to see where to stop!
Bring the train to a stop and press 'T' to open the doors.
Congratulations, you have driven to your first station!
Now repeat the process right up the line until you get to Maud. Watch out for the train speeding up and slowing down on gradients, and allow yourself more or less time to stop if you are going faster, slower, uphill or downhill.
Once you get to Maud, come back to this tutorial to see how to split the train!
5. Disconnecting Carriages
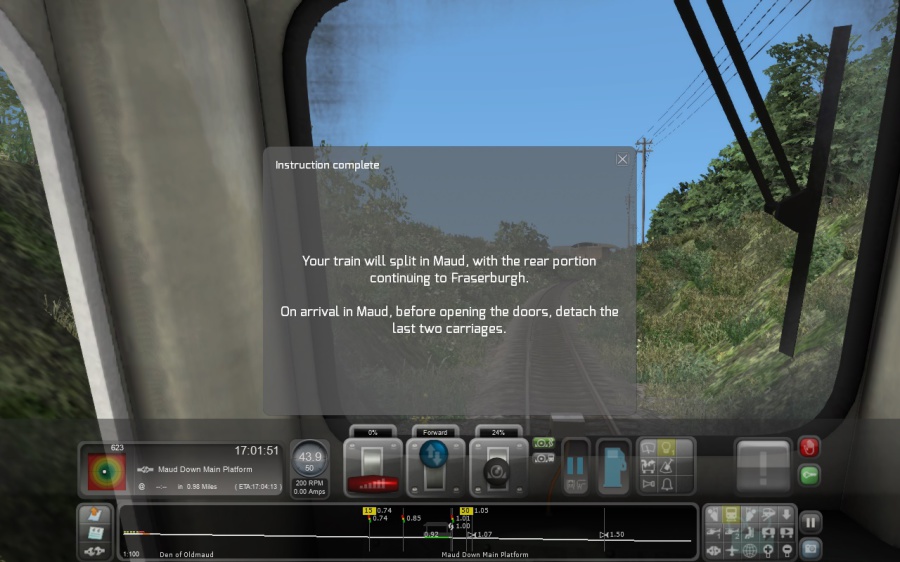
As you approach Maud, you will see this message box appear, indicating that you have to disconnect some carriages before allowing the passengers to alight.
Watch out for the speed limit dropping to 15 miles per hour approaching Maud, When you arrive in platform, do NOT open the doors!
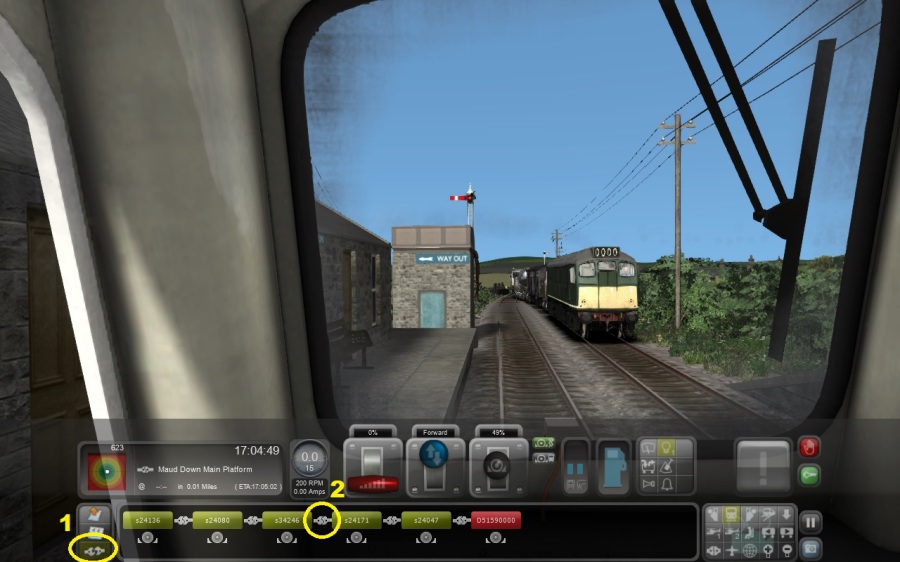
Once you arrive in Maud station, click on the Coupling Icon, shown as item 1 in the diagram on the left here. This switches you to coupling mode.
Disconnect the last 3 carriages by clicking the join in item 2.
That's it! Your train now only contains two carriages, as was common for trains between Maud and Peterhead at the time. Click the Coupling icon again to switch back to regular HUD mode, then open the doors and continue the journey the journey to Peterhead as you were doing before.
95 minutes after leaving Aberdeen, you will arrive at your final destination of Peterhead. Congratulations, you have now driven your first train up the Buchan Line!